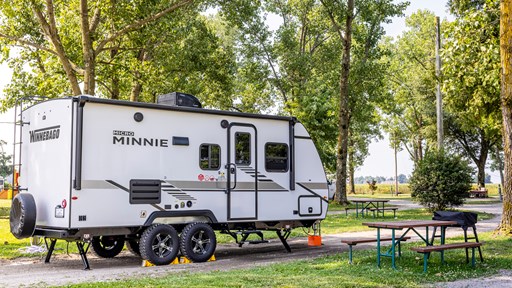
Slide-outs provide additional living space in a camper while it is parked. Before you travel to the next campground, you can retract them so that your RV is safe for driving on the road. Properly functioning slide-outs bring an enjoyable camping experience, allowing you to appreciate all the space your motorhome offers. Since correct functioning matters, stay on top of maintenance, including lubricating moving parts to enhance your travel experience. Here’s how to lubricate RV slides and perform other essential maintenance.
The Importance of Lubricating Slide-Outs
Proper slide-out lubrication makes up an essential part of overall maintenance, providing the following benefits:
- Protection: A layer of lubricant can protect metal components from rust and corrosion.
- Smooth operation: Applying lubricant enables the slide-outs to run smoothly, reducing the chances of components bending or getting stuck.
- Longer life span: Ongoing maintenance enables you to keep essential parts in better shape so your RV runs longer.
- Less wear: Dirt and grime in the tracks lead to damage over time. Lubrication removes these substances and develops a barrier around the metal.
Tools and Materials Needed
You will need a few things to lubricate your RV at home:
- Cleaning rags
- Bristle brush (optional)
- Isopropyl alcohol in a spray bottle
- Air compressor or bottled air (optional)
- Dry lubricants, for instance, 3-in-One RVcare Slide-Out Silicone Lube or CRC Power Lube With PTFE (check compatibility with your specific RV model and manufacturer recommendations)
- Plastic gloves and protective eyewear
You may already own some of these supplies, such as cleaning rags. Depending on your preference, you can use what you have or acquire a specialized set of basic supplies. Make sure you buy a recommended lubricant option to protect your RV. It must be dry lube to properly lubricate the surface and prevent dirt from clinging to the mechanisms.
How to Lubricate Your RV Slide-Outs
Slide-out lubrication is reasonably straightforward, meaning many owners can do it themselves. If you are unsure, you can bring your camper to an RV repair technician for maintenance requirements.
The following guide covers a general overview of RV lubrications step by step. Still, it is a good idea to consult your manufacturer’s manual before you start, especially for an RV under warranty, as incorrect maintenance could void the protection. The manual likely includes specialized instructions for your particular rig.
1. Determine the Type of System You Have
Various RVs contain different slide-out systems. The mechanisms use varying hardware to accomplish the in and out motion. The type of system influences the lubrication process. Here is an overview of the leading hardware types:
- Rack-and-pinion or through frame slide system: These slide-outs run on a cog that matches a gear on the motor shaft. They can be identified by the presence of teeth along the length of the rail.
- Cable-driven: This mechanism, called a cable-slide system, uses cables running around pullies inside the RV. Look above the slide-out inside the camper for the pulley system, or check outside for metal cables.
- Schwintek: This system uses a worm gear to extend and retract the slide-out. It is made of aluminum, and the tracks consist of small, squiggly grooves.
- Hydraulic: These slide systems utilize a hydraulic pump to extend and retract the slides. However, there are still mechanical components that keep the slide properly aligned.
2. Locating Access Points
Once you identify the type of system, look for the access points. Start by parking your rig on level ground and opening the slide-outs fully. Once you have opened them, find the mechanism that brings them in and out, either along the side or under the slide-out.
Cable-driven and rack-and-pinion systems typically include easily accessible lubrication points, either the bar or cable. Schwintek systems have a particular lubrication point that is not along the full track. It is only near the trailer body where the tracks come in and out. Typically, you need to move a rubber flap to access the lubrication point, which can be found both inside and outside of your camper. The main lubrication point for hydraulic slide-outs is the mechanical components on the inner arms of the slide-out.
Consult your manufacturer’s manual for added support in identifying lubrication points.
2. Preparation
Before spraying lubricant, put on protective gear. Then, clean the area using a damp rag, compressed air, isopropyl alcohol spray or a cleaning brush. A wet rag does a decent job, but a brush can help you reach small crevices, like the grooves along Schwintek systems or teeth in the rack-and-pinion assembly. Compressed air frees loose dirt and debris. Isopropyl alcohol can work through grease and oil buildup. It also evaporates quickly, leaving you with a dry surface.
3. Applying Lubricant
After cleaning the tracks, you can apply lubricant. Shake the can before you spray, then follow the instructions for your slide-out type:
- Rack-and-pinion: Spray on all four inside surfaces of the track where it makes contact. If you are using a can with a straw, flip it up for tighter spaces or down for a wider spray. Do not apply lubricant to the gear mechanism.
- Cable-driven: You may apply lubricant to the cable outside the RV. Do not apply lubricant to any interior components.
- Schwintek: If the can has a tube, bend it to direct the spray, hold back the rubber shield to access the camper slide lubrication point, spray a few times from above (coupler) and below (gib), then go inside and repeat. Be sure to avoid the motor mechanism.
- Hydraulic: Fully extend the slide and clean the tracks and mechanisms with a damp cloth. Spray the lubricant on the tracks, gears and other moving parts.
After applying lubricant, it will dry quickly, so you can leave it on. Some owners wipe off the excess spray.
4. Testing the Slide-Outs
Once you apply lubricant, cycle the mechanism open and closed fully or incrementally several times while checking for unusual noises or resistance. This process allows you to distribute the spray evenly and identify any remaining issues. If you still notice snags in the operation, stop operating the slide-out and see a technician.
Slide-Out Maintenance Tips
Complete slide-out maintenance involves more than occasionally spraying with lubricant. Here are a few other tips to keep these components running well.
Maintaining Surround Seals
These rubber seals keep water and weather from getting into the walls and causing mold. Over time, they dry and crack, leading to damage. Wipe them clean, check their condition, and apply an RV-specific moisture-restoring protective product to both sides of the seal on the top, bottom and sides of your slide-out. This maintenance step should occur at least twice a year. Here are a few products to use:
Besides applying a seal conditioner, check your seals regularly before and after travel sessions for any damage.
Tracking Inspections and Maintenance
Inspections can do more than tell you whether to buy a used RV. Regular slide-out inspections help you identify issues early. Do a thorough visual inspection every time you lubricate slide-outs. Look for things like:
- Broken teeth (rack-and-pinion) or frayed cables (cable-driven)
- Loose bolts and broken gears
- Pinched wiring
- Ripped bottom cover
- Leaking seal
Some issues, such as loose bolts or pinched wiring, may be fixable by yourself, while others may require a maintenance expert to avoid injury or further damage.
Besides inspecting when you lubricate, also look quickly every time you close your slide-outs. Check around all sides for debris or issues, such as leaves stuck under the roof cover. Brush the top to avoid shoving debris into the rubber seals when you retract the component.
Following Lubrication Instructions
Each step matters when lubricating. Clean thoroughly to avoid trapping dirt in the components, which causes worse wear. Use a recommended dry lubricant to avoid complications. Oil-based lubes collect dirt, meaning they will cause more wear.
Lubing RV Slide-Outs Regularly
In general, try to lubricate slide-outs at least three times each year. The recommended frequency varies depending on various factors, including the manufacturer’s recommendations and the frequency of use. If you move a lot, lubricate the components about once a month. Hot, dusty areas, cold weather or coastal regions can also wear the mechanism faster. If you often travel to these climates, consider shortening your time between lubrications.
Common Mistakes to Avoid
The slide-out maintenance process requires a particular set of steps for the best results. Here are a few things to avoid.
Over Lubrication
Apply enough lubricant to cover the needed areas, but avoid adding too much. An excessive amount increases the drying time. Wet lubricant may also trap dirt as it dries, especially if drying takes a long time. When applied too liberally, lubricant may damage other components, such as nearby electrical parts. A small amount ensures the lube stays only where it is needed. Overusing lubricant also means you use more products and must stock up on your maintenance supplies more often.
Using Incorrect Lubricants
During RV slide-out lubrication, use a specialized RV lube. Any lubricant that contains oil will only collect dust.
Ignoring Signs of Wear and Tear
Look out for signs of issues, such as:
- Squeaking
- Scraping
- Grinding
- Jerky movements
- Mechanisms that get stuck
- Slide-outs that move slower than normal or that do not move evenly
Each of these issues signals a need for maintenance. Sometimes, the maintenance may be as easy as lubricating rails or cables. In other cases, you may need to schedule a visit with an RV repair specialist.
Opening on Nonlevel Surfaces
Whether for maintenance or regular use, opening slide-outs on a slope causes damage to the components. Park your rig and verify it is level before operating the slide-outs.
Why Trust Kampgrounds of America for RV Advice?
Since 1962, KOA has served campers of all types, including RV owners. Over this long history, people throughout the chain of campgrounds have amassed plenty of specialized insight to help campers make the most out of every moment, from vacations to the RV maintenance you do in between.
The KOA team consists of knowledgeable members in every area of camping, including keeping your rig in top shape. Beyond extensive knowledge, the team is passionate about helping people get out and explore. This zeal drives team members to learn more and give you the best camping experience. KOA goes the extra mile to prepare educational resources so you can travel in a well-maintained rig.
Get Your RV Ready for the Next Trip
After you know how to lube RV slides, you are ready to hit the road. Head to a KOA Campground for an exceptional camping experience. All locations offer well-maintained, level RV Sites. Campgrounds also include full-hookup site options and amenities to make your stay more relaxing and enjoyable. Find an RV Site near your next destination and reserve it online today.
About the Author: Kampgrounds of America
Kampgrounds of America is the largest system of open-to-the-public campgrounds in the world, with over 500 locations across the United States and Canada. Founded in Billings, MT in 1962, KOA’s family of campground brands – KOA Journey, KOA Holiday and KOA Resort – today serve more than a million camping families each year. KOA is dedicated to “connecting people to the outdoors and each other” by providing people with a variety of camping experiences and the information they need to make the most of their camping trip. Read more of their camping and travel resources by visiting KOA.com/blog.


