RV roof care is a critical yet easily forgettable part of maintaining your RV. Routine inspection and repairs can prevent wear and tear, leaks and other problems that can lead to extensive, costly repairs. It is important for RV owners to understand what they need to do to keep their RV roof clean and sealed. With the right materials and a little time, you can keep your RV roof in top shape, so your rig is ready to go for your next camping trip.
Why Is RV Roof Maintenance Important?
When your RV is parked in storage, driving down the road and sitting at the campsite, the roof is experiencing wear and tear. Without routine maintenance, minor problems can turn into major issues, such as leaks, water damage and mold. At the least, these issues may delay your camping season as you repair the damage. At the most, you may need to have a professional complete the repair. These services can be costly and are generally not covered by your warranty or insurance plan.
Types of RV Roofs
The type of material an RV roof is made from depends on the model. While most travel trailers have rubber roofs, clamshell trailers and motorhomes are most likely to have fiberglass roofs.
Rubber Membrane
Rubber RV roofs are made from a thin weatherproof membrane stretched over a wooden substrate. The most common rubber roofs are:
- Thermal polyolefin (TPO): TPO resists dirt and mold, is easy to install and is cost-effective. The white material is energy-efficient and can help your RV stay cool. However, TPO is susceptible to UV damage if left in the sun without the appropriate maintenance.
- Ethylene propylene diene monomer (EPDM): EPDM is one of the most durable RV roof options. It is resistant to scratches and scuffs, and it can withstand direct sunlight and high temperatures. It is also easy to install and affordable.
Fiberglass
Fiberglass roofs are made of synthetic materials and glass fibers. This molded product is made into sheets or panels that can be customized for the RV. The advantages of fiberglass RV roofs include their lightweight design and durability against rust and rot. However, prolonged exposure to heat can cause thermal splits requiring extensive repairs or an entire replacement to fix.
Aluminum
Aluminum RV roofs are not as common in modern RVs. While the material can last a long time, aluminum has some drawbacks to consider — it has to be fastened, which can create seam failure, and the material can hide leaks.
Common Issues With RV Roofs
The roof is the frontline against the elements, making it prone to damage. Many factors can cause problems with an RV roof, including:
- Age: Years on the road can damage RV roofs and cause the material to break down.
- Physical damage: Impacts and scrapes from tree branches and other objects can puncture an RV’s roof, allowing water to get in your RV.
- Environment: Sunlight, extreme temperatures and rain can compromise the integrity of an RV roof and cause further damage.
- Deteriorated seals: Over time, sealants and caulk can break down and let water into the RV. A small gap can create a slow leak not obvious from inside the RV.
Some of the most common problems with RV roofs include:
- Leaks: If the roof material has holes or degradation, or the roof accessories are not properly sealed, these areas can create a leak. When water gets into your RV, it can cause extensive damage, from discoloring the interior roof to degrading the roof’s structural integrity.
- Cracks and tears: Depending on the state of the roof’s tears and cracks, you may need to complete a patch repair or replace the entire roof.
- Mold and mildew: Pooled water and shade encourage the growth of mold and mildew, which can be difficult to clean from an RV roof.
- Oxidation: RV roofs can oxidize over the years. The roof material will lose its shine, roughen and shed a powdery substance.
- Pooling water: RV roofs with poor drainage have low areas that collect water from washing or rainfall. Water sitting in one spot for too long can compromise the roof material and encourage bacteria growth.
- UV damage: Exposure to UV rays can cause the roof material to degrade. Degradation can create roof quality concerns that prevent coatings from adhering to the roof.
RV roof inspections detect these issues early, so you can fix them right away and prevent severe damage.
Benefits of Regular RV Roof Maintenance
Performing RV roof maintenance regularly offers several benefits:
- Save money over time: Though regular maintenance requires you to invest time and money into cleaning and repairing your roof, you will save even more in the long run. Maintenance helps your RV last longer by fixing minor issues before they become major problems.
- Protect the roof from the elements: All types of weather can cause wear and tear on your roof. With maintenance, you can enhance your roof’s weather resistance and reduce the chance of a leak or degradation.
- Preserve the RV’s interior: When you keep the roof well maintained, the inside of your RV will also benefit. With a durable roof overhead, the roofing materials will stay in good condition, preventing leaks inside.
- Give you peace of mind: RV roof maintenance allows you and your family to enjoy camping without worrying about the roof.
- Prolong the roof’s life span: Taking care of your roof helps it last longer. Sealants, caulk, cleaners and more keep the roof in its best shape, resulting in fewer repairs and replacements later.
- Increase your RV‘s value: A well-maintained RV is typically more valuable than one with a leaky roof. RV roof maintenance now can make it easier to sell or trade in your RV in the future.
Tools and Materials for DIY RV Roof Maintenance
Regardless of the roof material, RV owners should complete preventive maintenance every one to three months. You will need these tools and materials:
- Roof sealant: Roof sealant protects the roof of your RV from damaging UV rays. It prevents fading and cracks that can lead to leaks and water damage. Using the right type of sealant designed for the task is important for the best results.
- Caulk and caulking gun: If the caulk is missing or deteriorated, use a battery-operated or manual caulking gun to seal vents and other roof accessories.
- EternaBond tape: EternaBond repairs small tears and gaps in the roofing membrane and is handy for quick and easy repairs.
- RV roof cleaner: A store-bought or homemade roof cleaner removes dirt, dust and debris from your RV’s roof to make it clean. Avoid citrus, petroleum solvents and abrasives, as these ingredients compromise the bonds in roofing materials.
- Soft bristle brush: A brush will help you scrub cleaners onto the roof to remove dirt and debris. The soft bristles protect the roof material from scratches.
- Seam roller: A seam roller makes sure EternaBond tape, roof patches and similar materials are fully adhered to the roof. Many roller widths are available.
- Safety gear: Work gloves and safety goggles protect your hands and eyes while working with sealants and waxes. You can also use a fall protection system to prevent you from accidentally falling off the roof.
Steps for RV Roof Inspection and Cleaning
Follow these instructions to inspect your RV roof for possible damage and clean it to preserve its condition.
Examine for Damage
Inspect your roof for rips, cracks, tears and separations — the smallest opening in the roof material can cause significant problems. If you notice these problems, fix them right away before they lead to further damage and expensive repairs. Pay careful attention to the areas prone to cracks and mold growth, including:
- AC unit
- Vents
- Roof rack
- Skylights
- Ladder mounts
- Gutters
Inspect the RV roof every three months and after every long trip. You can examine the roof from a stepladder or by walking on the roof itself if it is designed to walk on. RVs that have a built-in ladder generally have a walkable roof. However, follow the RV manufacturer’s guidelines for the roof’s weight limits. Additionally, be careful not to step on the roof cross spars and watch for obstacles when on the RV roof for your safety.
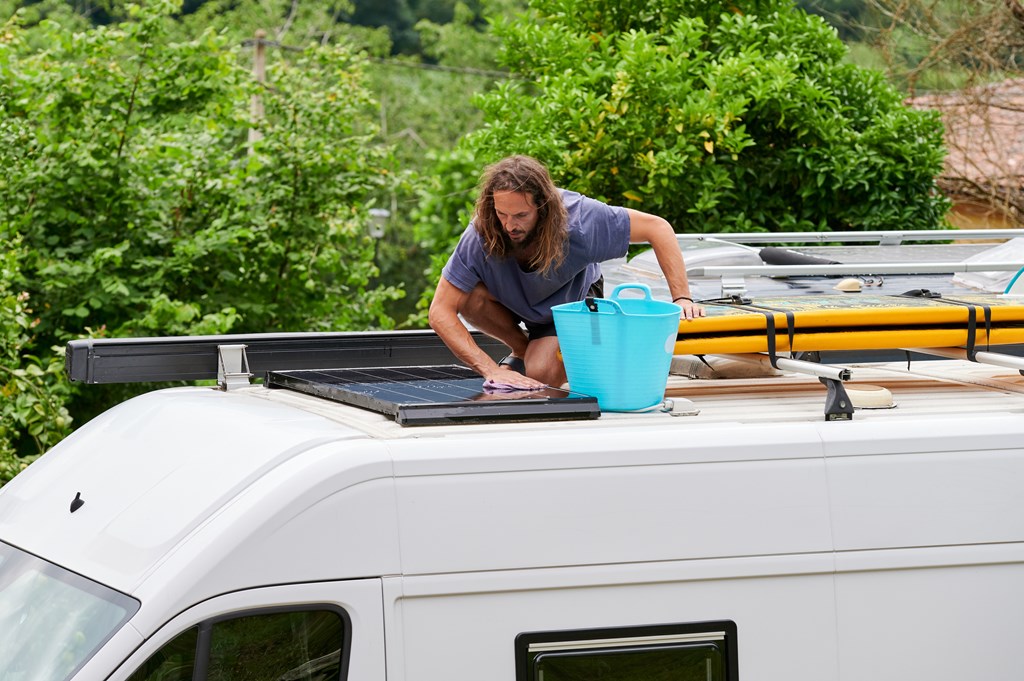
Clean the Roof Surface
Debris, dust and dirt that collect on your RV’s roof, combined with warmth and moisture, can encourage mold growth. This debris can also prevent protectants and sealers from working correctly and decrease the life span of your roof material. Cleaning your RV roof several times a year removes the debris and prevents mildew from taking hold and causing further damage.
Follow these steps to clean your RV’s roof:
- Sweep debris off the roof, especially in the areas around the roof fixtures.
- Use a hose and water to rinse off the roof.
- Apply a cleaner to the roof. You can use a cleaning product designed for RVs or make your own cleaner using products you already have on hand. If the dirt and stains are set in, let the cleaner sit for a few minutes.
- Scrub the roof with a brush, moving in circular motions.
- If needed, add more cleaner and scrub until the roof is clean.
- Wash down the roof of the RV again to remove the cleaner.
- Apply a protectant or sealant to the surface to protect it from further damage and make future cleanings easier.
When washing the roof, the debris may streak and discolor the sides of the RV, so give your entire RV a rinse after cleaning the roof.
Hiring Professional RV Roof Maintenance Services
While you can add waxes and sealants to the roof yourself, some RV owners prefer to leave it to the professionals. Incorrectly applying these products can damage your roof. Safety is also a concern since waxes are slippery and can make walking on the roof risky.
An RV repair technician can apply coatings, make repairs and replace sections of or the entire roof, depending on what your RV’s roof requires.
Roof Coating Services
Whether your RV’s roof has issues or is in top condition, sealing and coating regularly are beneficial. A professional can reseal and recoat your roof with a product designed for your RV’s roof.
Have an RV repair technician apply these products to the roof at least once per year:
- Roof sealant: Your RV’s original sealant can wear off or crack over the years, potentially leading to water damage. Resealing the roof at least every five years protects your RV from leaks. The entire roof should be sealed, especially the areas around roof openings, like skylights and vents.
- Oxidation restorative wax: If your RV’s roof has surface oxidation, it can be removed with a restoring wax. This product has a mild abrasive to remove the oxidation and can be buffed until it shines.
- UV wax or sealant: A UV sealant or wax protects the RV roof from UV rays, as exposure to the sun can make the roof material crack and leak. This sealant also makes the roof shiny and prevents black streaks from forming on the walls.
- Roof conditioner: After cleaning, an RV roof needs some moisture added back. A conditioner adds moisture to the roof materials to keep seals flexible. Flexibility prevents seals from becoming brittle and breaking and cracks from forming. A professional will use a roof conditioner designed for RV roofs. Some conditioning products offer UV protection for multiple benefits.
Roof Repair and Replacement
Though your RV’s roof should last for years, a fallen tree branch, sun exposure and other factors can lead to tears, cracks, separated joints and other issues. Roof repair services can fix these issues and improve the condition and integrity of your roof. Some RV insurance policies expect a roof replacement every 10 to 15 years.
EternaBond tape is one method for RV roof repair. This tape covers small tears and roof and wall separations alike, creating a watertight seal that prevents water from getting into your RV. After cutting the tape to size, leave a large margin around the tear and press it into place, ensuring the piece is laid flat against the surface.
If you would prefer to leave the work to a professional, your local RV repair shop can complete the necessary repairs or replacements.
Why Trust Kampgrounds of America for Information on RV Roof Maintenance?
KOA has more than 500 campgrounds throughout North America near historic cities and beautiful landscapes. With more than 55 years of experience, KOA provides a premier camping experience that caters to every vacationer.
This experience with camping extends to caring for an RV. KOA’s helpful staff are trained and knowledgeable in RV maintenance best practices, from the roof to the tires. You can find informative posts about how to care for your RV on the RV advice blog. Following these tips and tricks will help you keep your RV in its best shape, so you can camp at KOA whenever you want to enjoy the great outdoors and make memories with your family.
Reserve a Site at a KOA Campground Today
KOA has hundreds of campgrounds offering fun experiences and amenities for you and your family. Check out the RV Sites, and reserve a site today!
About the Author: Kampgrounds of America
Kampgrounds of America is the largest system of open-to-the-public campgrounds in the world, with over 500 locations across the United States and Canada. Founded in Billings, MT in 1962, KOA’s family of campground brands – KOA Journey, KOA Holiday and KOA Resort – today serve more than a million camping families each year. KOA is dedicated to “connecting people to the outdoors and each other” by providing people with a variety of camping experiences and the information they need to make the most of their camping trip. Read more of their camping and travel resources by visiting KOA.com/blog.