How to Dehydrate Food For the Perfect Camping Snack
Reposted from the KOA blog:
The focus for prepping camping food is typically on the meals that are at the heart of your day, and meals are definitely a high priority. However, we’d be lying if we said snacks weren’t also a very important part of the camping experience, and though maybe not an absolute necessity, snacks are something we don’t want to go without.
The snacks that are typically remembered for camping tend to be the ones that lean more towards the unhealthy side. We are talking chips and candy. These are easy to grab last-minute or during your road trip en route to your camping site, but they aren’t the ones you want to make a habit of eating. This is especially true if you’re a regular camper. There are so many snacks out there that give you the satisfaction and the fuel to make the most of your time in nature. And our favorite way of making those snacks is by dehydrating some of our favorite foods.
If you’ve ever wanted to dehydrate some snacks but didn’t know how, read on for our guide to dehydrating the perfect camping snacks.
Food Dehydration 101
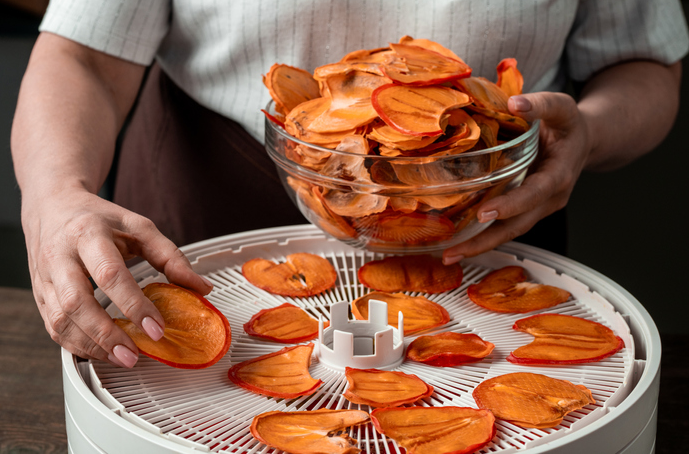
The Dehydrator
The first step in dehydrating food is to get a dehydrator. Without this tool, you may not have much luck.
There are a number of different dehydrators on the market to choose from. Though they may offer different bells and whistles than others, for the most part they are the same. That is unless you get into the high price range of dehydrators. You can get this kitchen accessory for anywhere between $30 and $200.
In order to know you’re getting a dehydrator that will do the job, here are the key things to look out for that are a sign of a good machine.
- Size. The bigger the dehydrator, the more food you can dry out. However, the bigger the machine, the more space it will take up in storage. If storage is not an issue for you, then that is no concern. But if it is, you may have to make some sacrifices on the size of dehydrator you choose.
- Shape. A more rectangular machine or square has more usable area to dry your food out. Some round dehydrators have a hole in the middle of the tray, which cuts down on your drying area.
- Timer. Not all are built this way, but we love a dehydrator that turns off when the timer ends. These allow you to program the drying in one-hour interviews, typically.
- Range of Temperature. The more options you have for temperature, the better. If you have a machine with a wider temperature range you will be able to dry more types of food.
- Even Heat Distribution. When drying out your food, you want to make sure the heat is evenly distributed so you don’t end up with half a batch of dried apples.
If you aren’t exactly sure of how much you’ll be using this machine, and to what extent, it’s a good idea to start off with a less expensive model. Then you can work your way up from there, if necessary.
Things To Keep In Mind When Dehydrating Food
What you put in isn’t what you get out. While that may seem obvious, we mean that the amount of food you put into your dehydrator will not be the same amount of food you get out. As the food loses moisture in this machine, the food shrinks a great deal. This means that drying an entire pound of apples only results in a cup of dehydrated apple slices.
It is also important to cut the food in thin, even slices. This will help to ensure even cooking and help to keep food from spoiling. If you have slices of food that weren’t dried fully, they run the risk of ruining the entire batch in storage.
How to Dry Your Food
Fruit
The best fruit for drying is fruit that is high-quality and was picked when ripe. If you swing to the overripe side of things, you run the risk of the fruit turning black when you dry it.
If you choose to leave the skins on, make sure you wash them and then either remove the core or pit. Then you’re ready to slice them and lay them flat on the tray.
Fruits including apples, bananas, nectarines, and peaches take anywhere from 6-16 hours to dry. And fruits such as grapes, pears, and figs take between 20-36 hours to dry. It’s best to check on the fruit every 2-3 hours to make sure everything is cooking evenly.
Vegetables
Chances are good you were surprised at how long dehydrating fruits such as grapes take. Thankfully, vegetables don’t take as long to get the job done. However, they also spoil more quickly. That means you need to take more care when preparing your vegetables for drying.
A good place to start is ensuring you keep them in the fridge until you’re ready to dry. And when you are ready, you want to remove any tough pieces as well as the stem (if applicable). Also, take care to cut off any bruises or spots that may spoil the vegetable further. Cut the pieces as evenly as possible and lay them out on the tray.
Drying times for vegetables range from 4-10 depending on the vegetable you are making.
Storing Dehydrated Foods
Storage is one of, if not the, most important parts of the drying process. If you store the food correctly, dried fruit can last up to 5 years, and vegetables up to 10 years. However, that requires proper storage.
If you know that you’re going to eat the dried fruit within a year, a Ziploc bag works great for storage, as long as you squeeze all the air out.
If you imagine it will be more than a year before you get into the snacks you dried, then vacuum-seal the food and store it in a cool and dark place.
But always use good judgment before eating. If the food smells a bit off, don’t risk it and throw it away. You don’t want to get sick from eating spoiled food.
Food Dehydrating FAQs
- Does dehydrating food kill nutrients?
Yes, this method of preservation will cause the food to lose some of its nutrients, but no more than any other mode of preservation. Why does this happen? Because light and heat are the two main things that cause nutrients to break down in food, and when you dehydrate food, you are heating it. - Can you dehydrate cooked food?
Yes, this is definitely something you can do. For camping, we love the idea of cooking meals and then dehydrating them to take with us, if time allows. However, there are different strategies and tricks to dehydrating entire meals that the things we mentioned above for fruits and vegetables. - Does dehydrating food kill bacteria?
If you lower the moisture levels in your fruit or vegetables between 5% and 20%, you remove bacteria that may cause the food to rot.
Food Dehydrating Recipes
Here are some of our favorite snacks to make with your dehydrator.
Fruit Leather
This tasty treat is a great alternative to less-healthy options and is perfect for a snack while out hiking.
What you need:
- 2 cups fresh fruit
- 3 T white sugar
- ½ lemon, juiced
What to do:
- Blend fruit, sugar, and lemon juice until smooth
- Line dehydrator with parchment paper and spread the fruit mixture evenly across the tray
- Set the dehydrator to 140F
- Set the timer to match with the type of fruit you’re dehydrating (anywhere from 4-12 hours). You will know it’s finished when the leather is no longer sticky
- Cut up into small pieces and roll up in parchment paper. Store in the fridge in an airtight container.
Cauliflower Popcorn
This quick snack is great fresh or dehydrated.
What you need:
- 1 head cauliflower
- 20 g olive oil
- 12 g nutritional yeast
- 2 tsp cumin
- 2 tsp chili powder
- Pinch of sea salt
What to do:
- Cut cauliflower into bite-sized pieces
- Toss with olive oil
- Add spices and toss again until coated
- Eat immediately or dehydrate at 115F for 8-12 hours
Lemon Pepper Potato Chips
This salty snack will quickly become a favorite.
What you need:
- 1 large russet potato
- 2 T coconut oil
- 1 cup water
- 1/2 cup lemon juice
- 1 tsp pepper
- 1 tsp salt
What to do:
- Cook the potato by piercing it and cooking in the microwave for 6 minutes
- Chop up the potato, and put it in a bowl
- Add in the rest of the ingredients
- Use an immersion blender to combine everything into a creamy potato paste
- Using a spatula, smooth the potato paste over parchment paper. Make this as thin as possible
- Put in the dehydrator, and cook at 145F
- Set timer for 4-6, after which you’ll flip the chips over and continue to dehydrate
- When dry, take the chips out and let them cool
- When cool, you can break them into smaller pieces
- Store in an air-tight container and eat within 1 or 2 days
Sweet Potato Chips
Take a tasty snack and make it healthy.
What you need:
- 2-3 sweet potatoes, sliced thin
- 1-2 tsp melted coconut oil per potato
- Sea salt
What to do:
- Peel and slice sweet potatoes as thinly as possible
- Put in a bowl and soak for 1 hour. Change the water after 30 minutes
- Place on a towel to dry
- Put back in the bowl, drizzle coconut oil, and stir
- Season with sea salt
- Put in the dehydrator and cook for approximately 12 hours at 145-155F
- Place sweet potatoes onto a cake cooking rack so that it gets proper ventilation on all sides.
- Cook until desired crispness
Apricot Coconut Cookies
This sweet treat is a new way to do dessert.
What you need:
- 1 cup peanut butter or other nut butter
- 2 cups pitted dates
- 1 cup dried apricots
- 1 cup coconut, shredded
- 1/2 teaspoon sea salt (if your nut butter is unsalted)
- Up to 1/4 cup water
What to do:
- In a food processor pulse dried fruit
- Add in peanut butter, sea salt, and puree
- Add coconut and pulse until the dough is dry enough to roll into balls (If it gets too dry, add in some water, one tablespoon at a time)
- With your fingers, pull out walnut-sized pieces of dough, roll into balls, and flatten with your palms to 1/4 inch thick.
- Place on the dehydrator sheet or parchment paper
- Dry for 6 hours
Leslie, a.k.a. Copy Girl, is a copywriter who gets butterflies from telling stories through words.
Her voice comes from a place filled with passion, dreams, and lots of sugar. “Cake over steak” is her go-to motto.
With over 10 years of experience in crafting words, and years of embarking on travels that have taken this Montana girl to some incredible places, Leslie love the adventures of both body and mind her writing takes her on.
Everywhere she goes, she takes this advice with her:
“Hold on to your divine blush, your innate rosy magic, or end up brown.” – Tom Robbins, Jitterbug Perfume
To see what Leslie’s up to in the writing world, visit her website here.

